This is my first post in a four-part series about digitization. My name is Allison Hale, Digital Imaging Specialist at Cooper Hewitt. I started working at the museum in 2014 during the preparations for a mass digitization project. Before the start of digitization, there were 3,690 collection objects that had high resolution, publication quality photography. The museum is currently in phase two of the project and has completed photography of more than 180,000 collection objects.
Workflows
Cooper Hewitt was the first Smithsonian unit to take on digitization of an entire collection. Smithsonian’s Digitization Project Office directed the project and an onsite vendor completed the imaging. Museum staff played an intensive role, allocating up to fifty percent of a workweek on digitization administration. Additional hires in the Registration and Conservation departments eased the daily organization and handling of the objects.

The goal was to take a physical object from storage shelf to public-facing digital image within 24-48 hours.
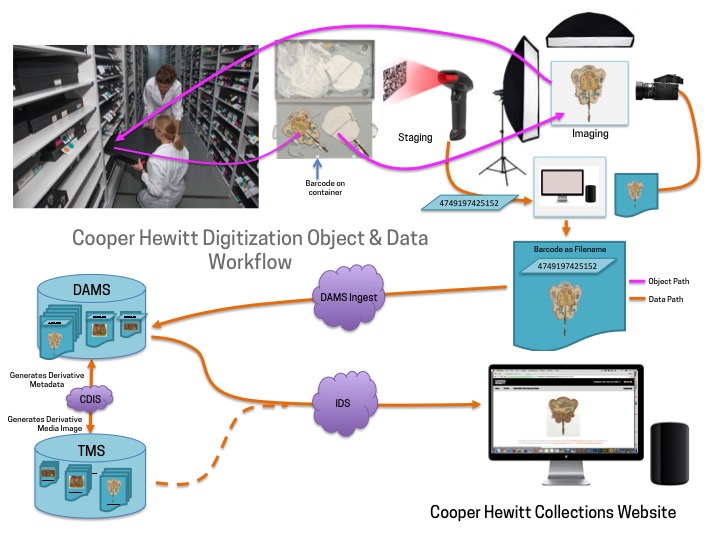
Here is a simplified version of the workflow:
Physical or Object Workflow
- The vendor’s photographic setup was located in our collections storage facility
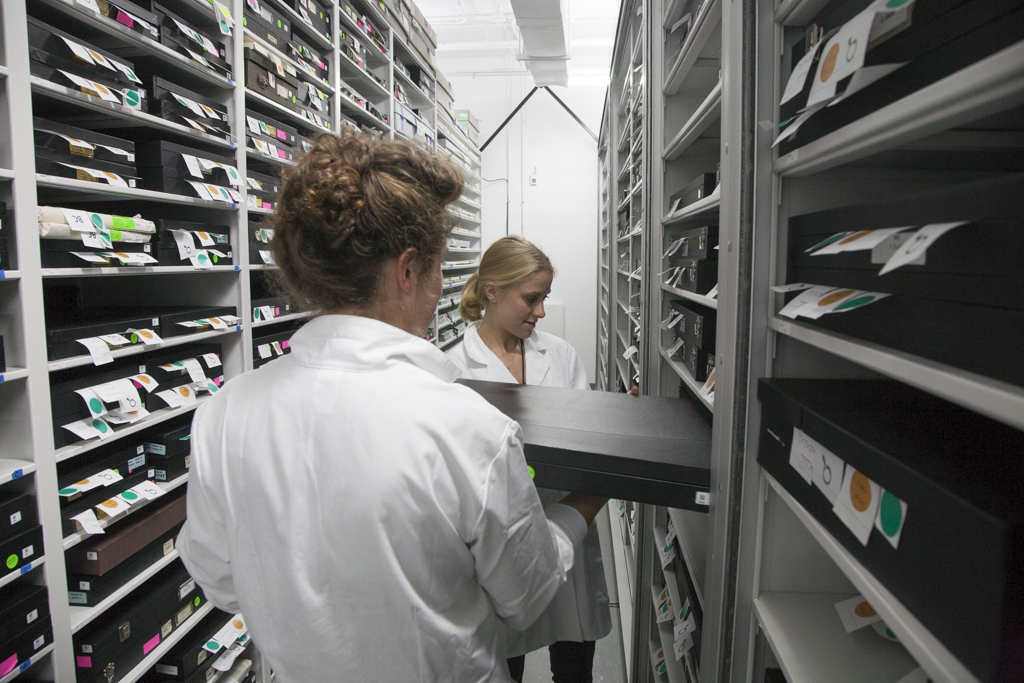
- Art handling technicians pulled pre-organized groups of objects from storage shelves to a staging area
- A group of objects located on the same shelf or container were carted into the staging area and then placed individually on a photographic set
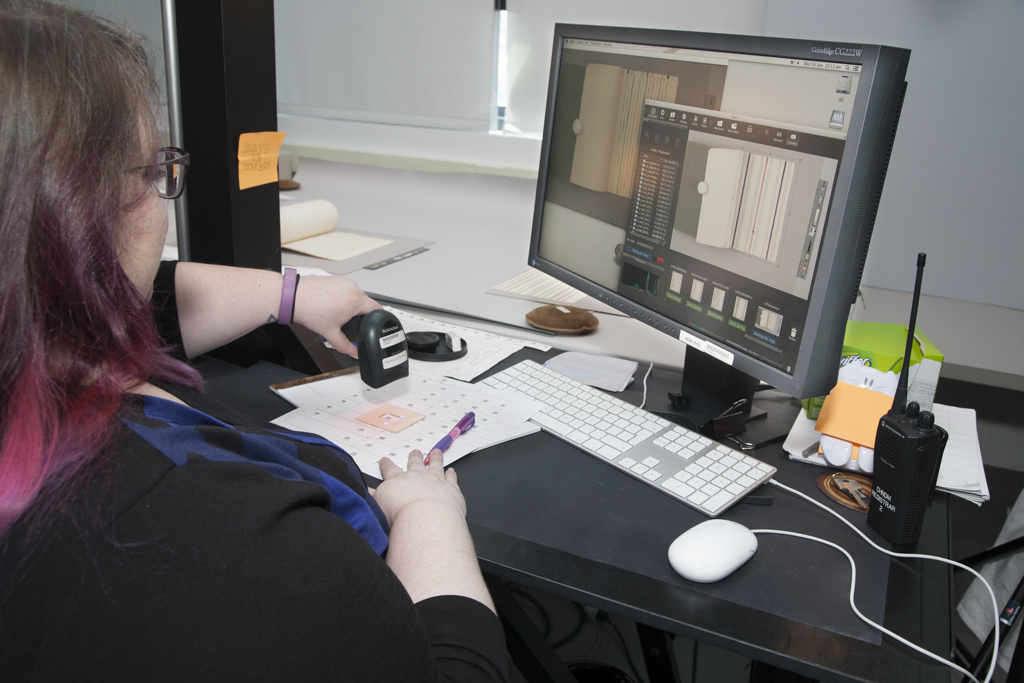
- The object barcode was scanned to create a file name
- Photograph is taken
- Object placed back in the staging area, matched with its barcode tags, and returned to storage
Data Workflow
- Assets from the project were stored on a production server
- Museum staff completed daily upload of assets to Smithsonian’s Digital Asset Management System (DAMS)
- DAMS became the repository for digital assets
- CDIS (Collection DAMS Integration System) provided synchronization of metadata from TMS, and delivered images to the object records in the collections database, The Museum System
- IDS (Image Delivery Service) provided public images for use on the Collections Website
Let me repeat the word simplified. Mass digitization applied to uniform collection can be simple, but application to various dimension, size, and materiality was new territory. I will point out some of the challenges that were faced during the process, and the digital innovations that improved efficiency and helped us to complete the process in 18 months.
Barcoding: Bridging the Physical to the Digital
The first stage of digitization was assessment and barcoding of 258,000 objects. Museum objects are categorized in four curatorial departments: Drawings and Prints, Product Design and Decorative Arts, Textiles, and Wallcoverings. A Project Registrar was hired to oversee the barcoding equipment and printing, reconciling object locations, and maintaining a pace for the project. Thirteen barcoding technicians with expertise in object handling and conservation were hired to complete a conservation assessment and barcode each object.
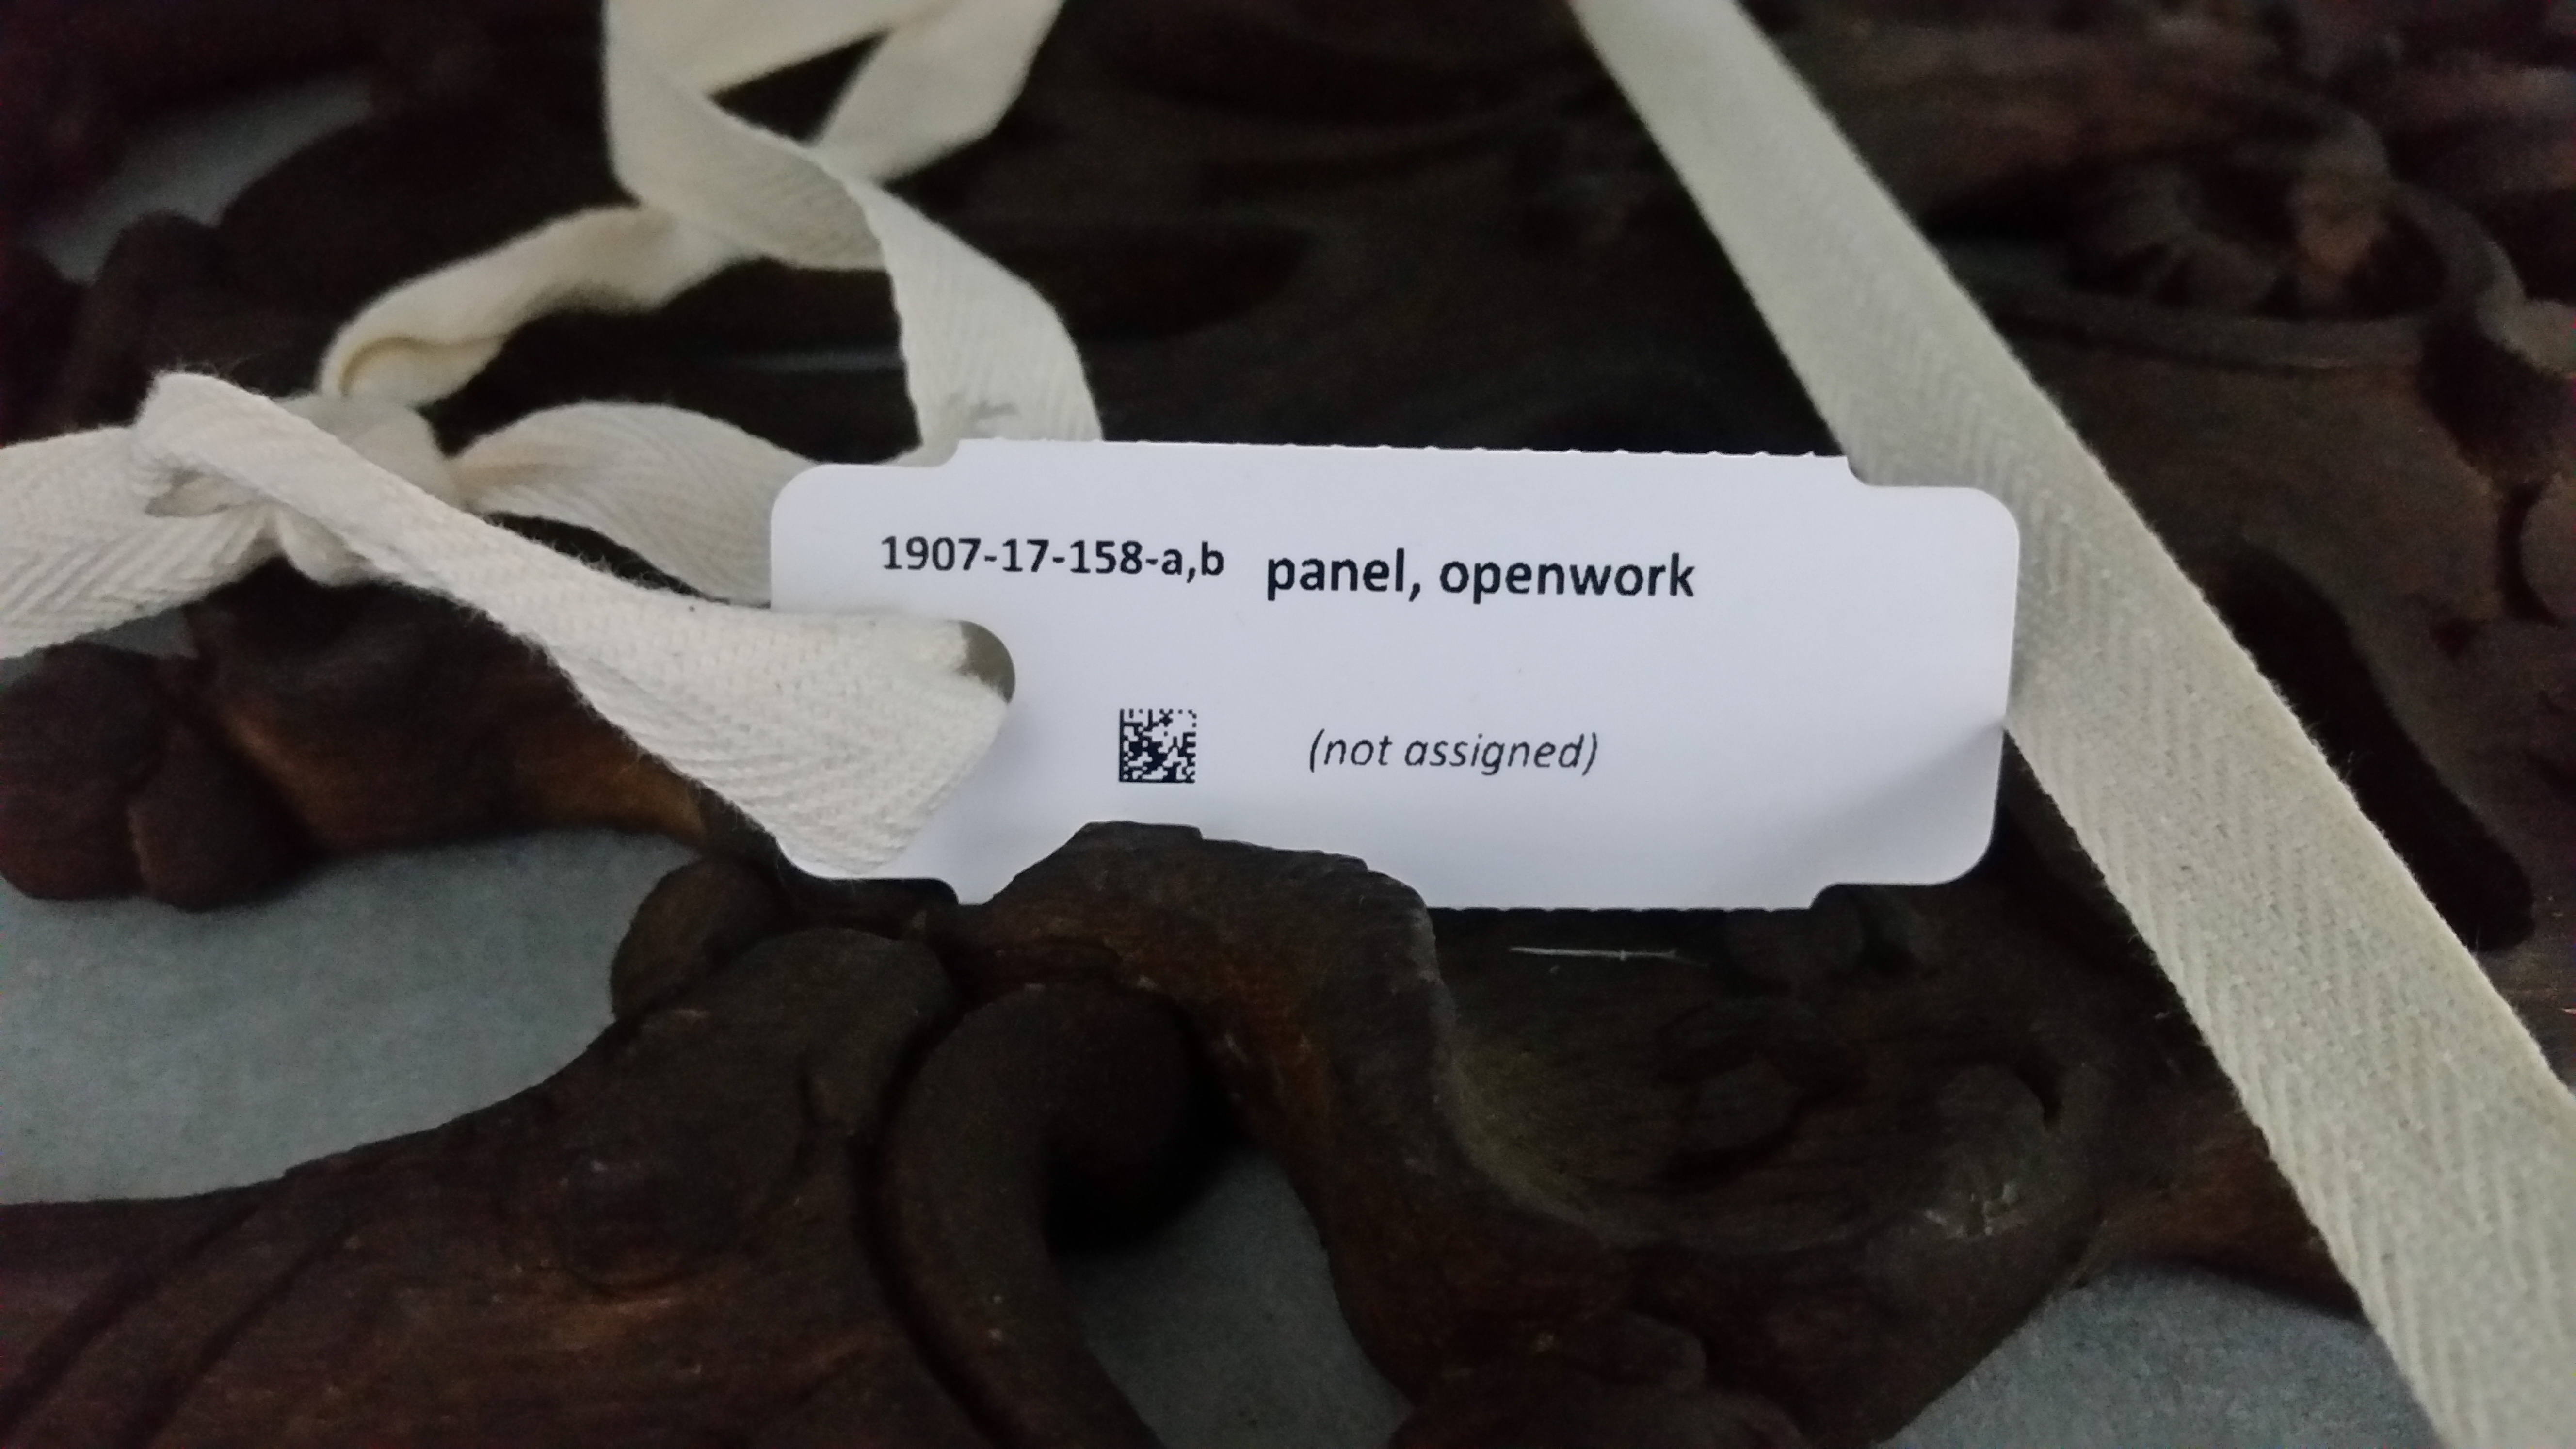
The Museum System, the collections database, contains a barcode number in each object record. This unique identifier was printed as a barcode and affixed to each object. The Registration staff decided that the most efficient way to barcode was not by “cherry picking” random objects, but by systematically working on one shelf or container at a time. A SQL query of a TMS location was used to find all objects on one shelf or in a single container. A software program called Label Matrix would pull, format, and print the query barcodes. A 2-D barcode could be printed as a sticker, for a larger “cover sheet” or as a non-adhesive tag.
Here were some of the challenges:
1. The object’s recorded storage location needed to be accurate
In an ideal workflow, the entire collection would be inventoried before digitization. This would provide accurate locations for each object. Instead, during the barcoding process the technicians were responsible to note any inaccuracies on a spreadsheet. The Project Registrar then reconciled the locations in TMS. The technicians barcoded locations and containers to improve tracking. The barcodes can be differentiated by last number in the sequence: “2” indicates an object, “1” a container, and a location “0”.
2. Objects in storage must be accessible to the digitization technicians
The Product Design and Decorative Arts Department contained sub-collections that were stored in temporary housing. The temporary housing was designed to transport the objects, but not for permanent storage. Conservators and technicians built permanent storage containers that allowed technicians to easily remove and replace objects during digitization. An example of this is the matchsafe sub-collection.

(from left) Matchsafes packed for travel; Technicians make new containers and barcode objects; Matchsafes in storage with barcodes in each container and a corresponding cover sheet.
3. Objects required special handling due to fragility or component assembly
The collection contains 211,000 objects. Due to conservation concerns and component assembly, approximately 10 percent of the collection could not be digitized. A visual system was created to alert digitization staff to the conservation “status” of the object: green=ready for digitization, yellow=digitization handling by conservator only, and red=too fragile for digitization. The visual system allowed the vendor staff to work independently in storage, rather than referencing TMS records.
4. The barcode needed to be scanned by the reader in a timely manner
A 2-D barcode was used so that the technicians could efficiently scan holding the reader in different positions.
5. The project needed larger organization so that every person involved could plan the timing of digitization
A chart was made to organize the Departments’ sub-collections. An initial count in the TMS database in the sub-collection categories gave an approximate number of items to be digitized. From this number, the Smithsonian’s Digitization Project Office could estimate the digitization rate, a sub-collection schedule, and cost per image. Curators, conservators and digitization staff would meet before the beginning of each sub-collection to decide upon the aesthetic of the images, conservation concerns and handling specifications.
Outcomes:
Object barcoding was a necessary step before the start of digitization. During the imaging workflow, technicians scanned the barcode to input filename. Eliminating the manual entry of filenames saved an average of 14 seconds per file, amounting to 103 working days. It also greatly decreased the rate of human error from manual entry.
The barcode filename became the metadata link between DAMS (Digital Asset Management System) and the collections database TMS. (A good lead-in to my next post!)
Next Post: DAMS and Metadata Mapping!


